In the last 12 months, Windows Azure has undergone a dramatic transformation. It’s gone from “What is it?” to “We need it!” in very short order. Much, if not all of this, can be attributed to the stellar leadership of Scott Guthrie and his team. It should come as no surprise the ASP.Net team, which includes all the goodies from ASP.Net MVC, Web API and SignalR to name a few, were and continue to be under ScottGu’s leadership. It’s another reminder of what the power of people (really smart people to boot), working together in furtherance of a common vision can accomplish. Today, Windows Azure is a manifestation of that accomplishment. Windows Azure is actually many things. It can host TFS, Windows (obviously), SQL Server as well as other non-Windows technologies like PHP, Ubuntu, Java, Node.js to name a few. Windows Azure also has the capacity to host “Big Data” and to be a full-fledged media server. One of the biggest catch phrases today is “Infrastructure as a Service” (IaaS). Though its virtual machine features, Windows Azure delivers this capability as well. For the full details on what Windows Azure can deliver, navigate to windowsazure.com.
The Example
If you have been looking for an easy way to run a Continuous Integration environment that auto-deploys a website for source control, then look no further than Windows Azure. In this article, I’m going to take you through the simplest set of steps possible to deploy an ASP.NET MVC web application to Windows Azure. The application source itself will be hosted on TFS 2012. The Azure web site will be linked to that TFS repository. As a result of this linkage, once the build service is successfully completed, the resulting web site will be auto-deployed to the linked Azure web site. Let me note that this scenario is supported for Git, but that is beyond the scope of this article.
Prerequisites
To follow along and try this yourself, you will need an Azure account. You will also need a TFS Preview account (tfspreview.com). The good news is that you can get these resources free. Simply go to windowsazure.com to sign up for your 3-month trial. In addition, for this article I’ll use Visual Studio 2012. You can get by with Visual Studio 2010 SP 1, which will allow you to connect to TFS 2012 Preview.
Step 1 - Create the ASP.NET MVC Application
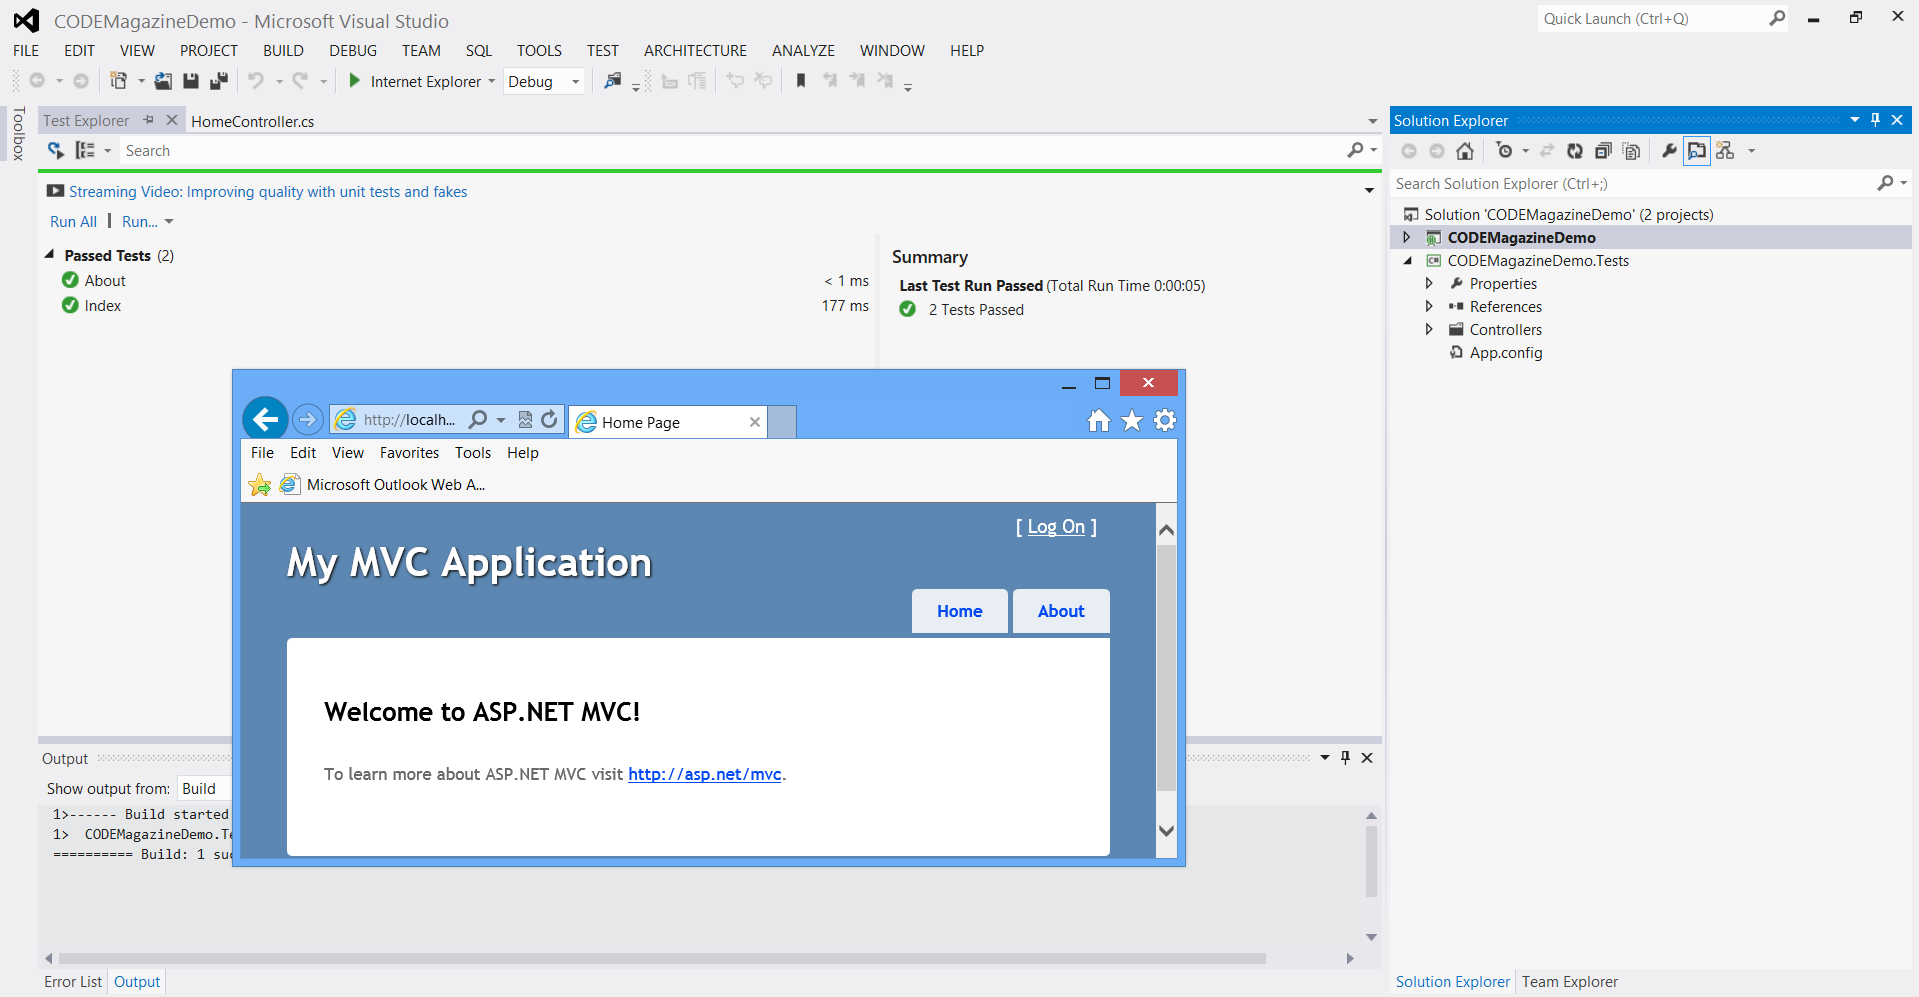
This is going to be a stock out-of-the-box ASP.Net MVC 3 application based on the .NET 4.0 Framework. To complete this step, simply create an ASP.NET MVC 3 Internet application. As of this writing, in a shared-hosted Windows Azure environment, .NET 4.5 is not supported. I’m sure in short order, that issue will be addressed. In addition to the MVC Application, I’ve also elected to create a unit test project. Figure 1 illustrates this simple application in Visual Studio and as it appears in Internet Explorer.
Step 2 - Create a Team Project on TFS
With the ASP.NET MVC Application created, let’s create a TFS 2012 Team Project. Once you have logged into your TFS Preview Account, click Create a team project in the Getting Started section. Figure 2 shows the Create New Team Project dialog box.
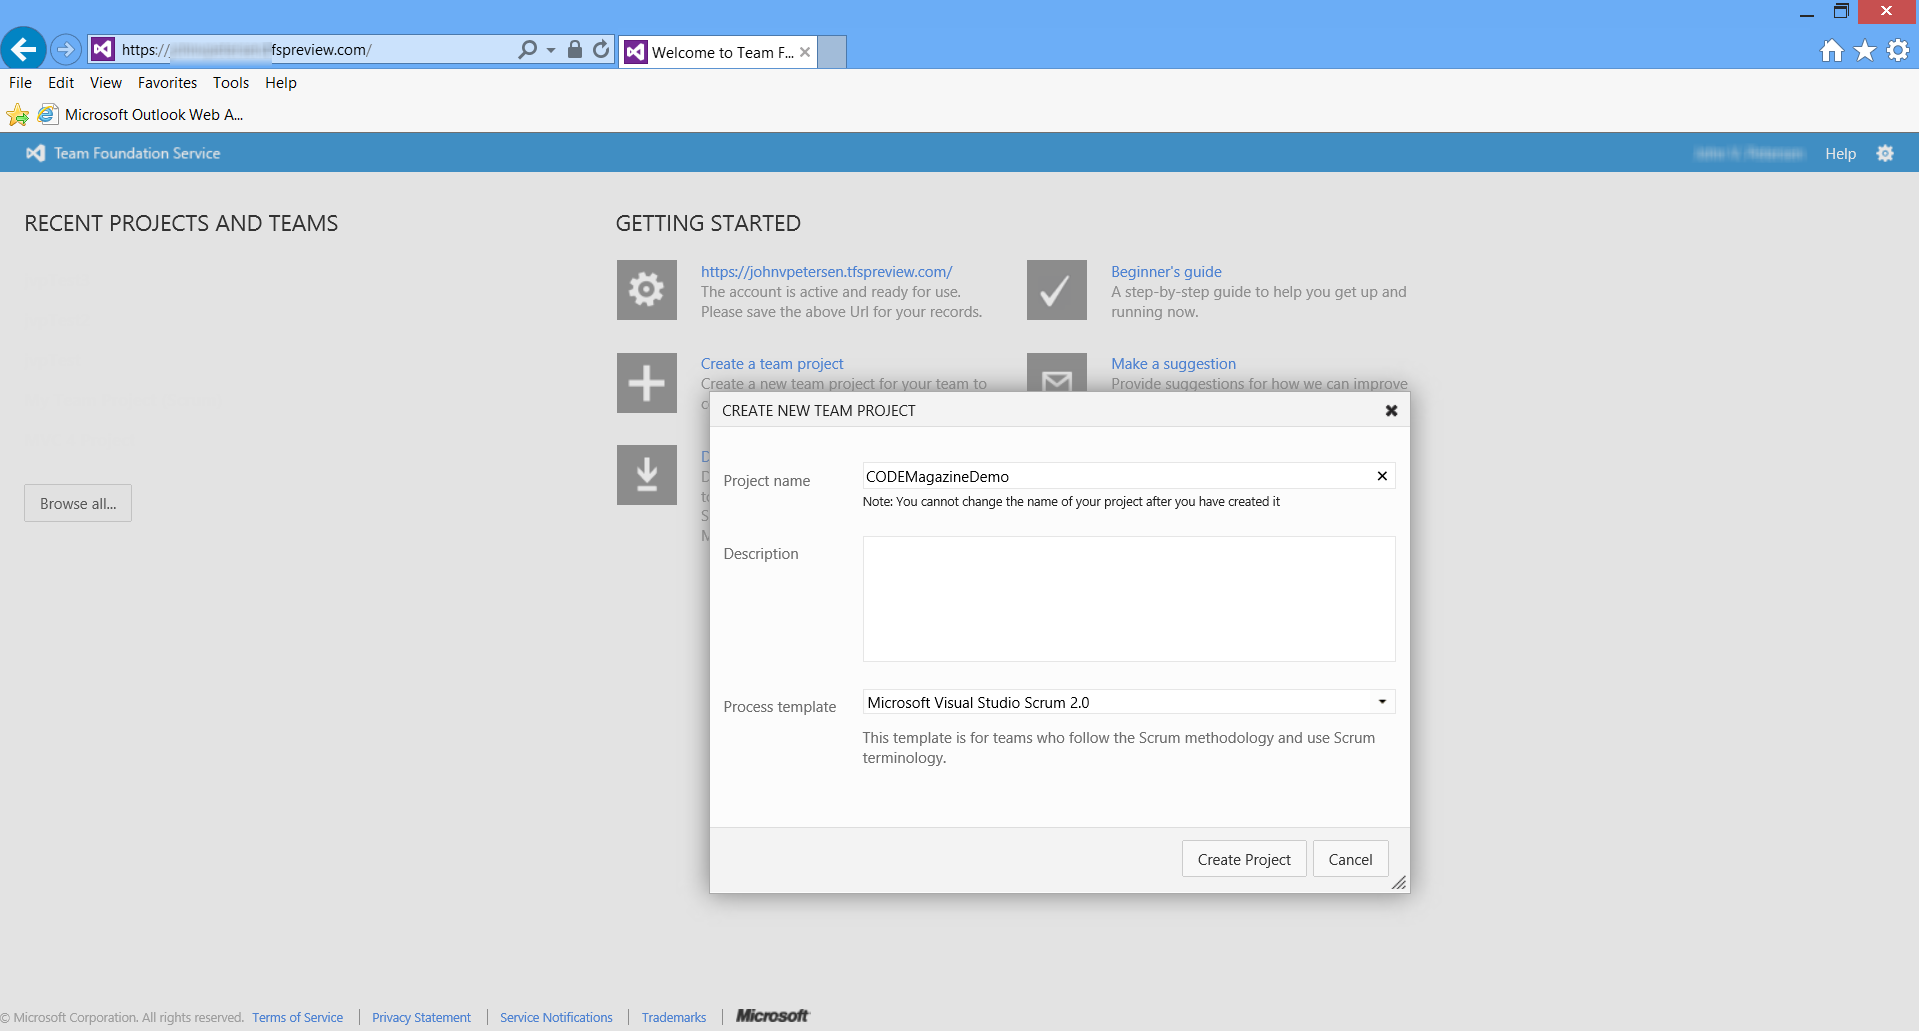
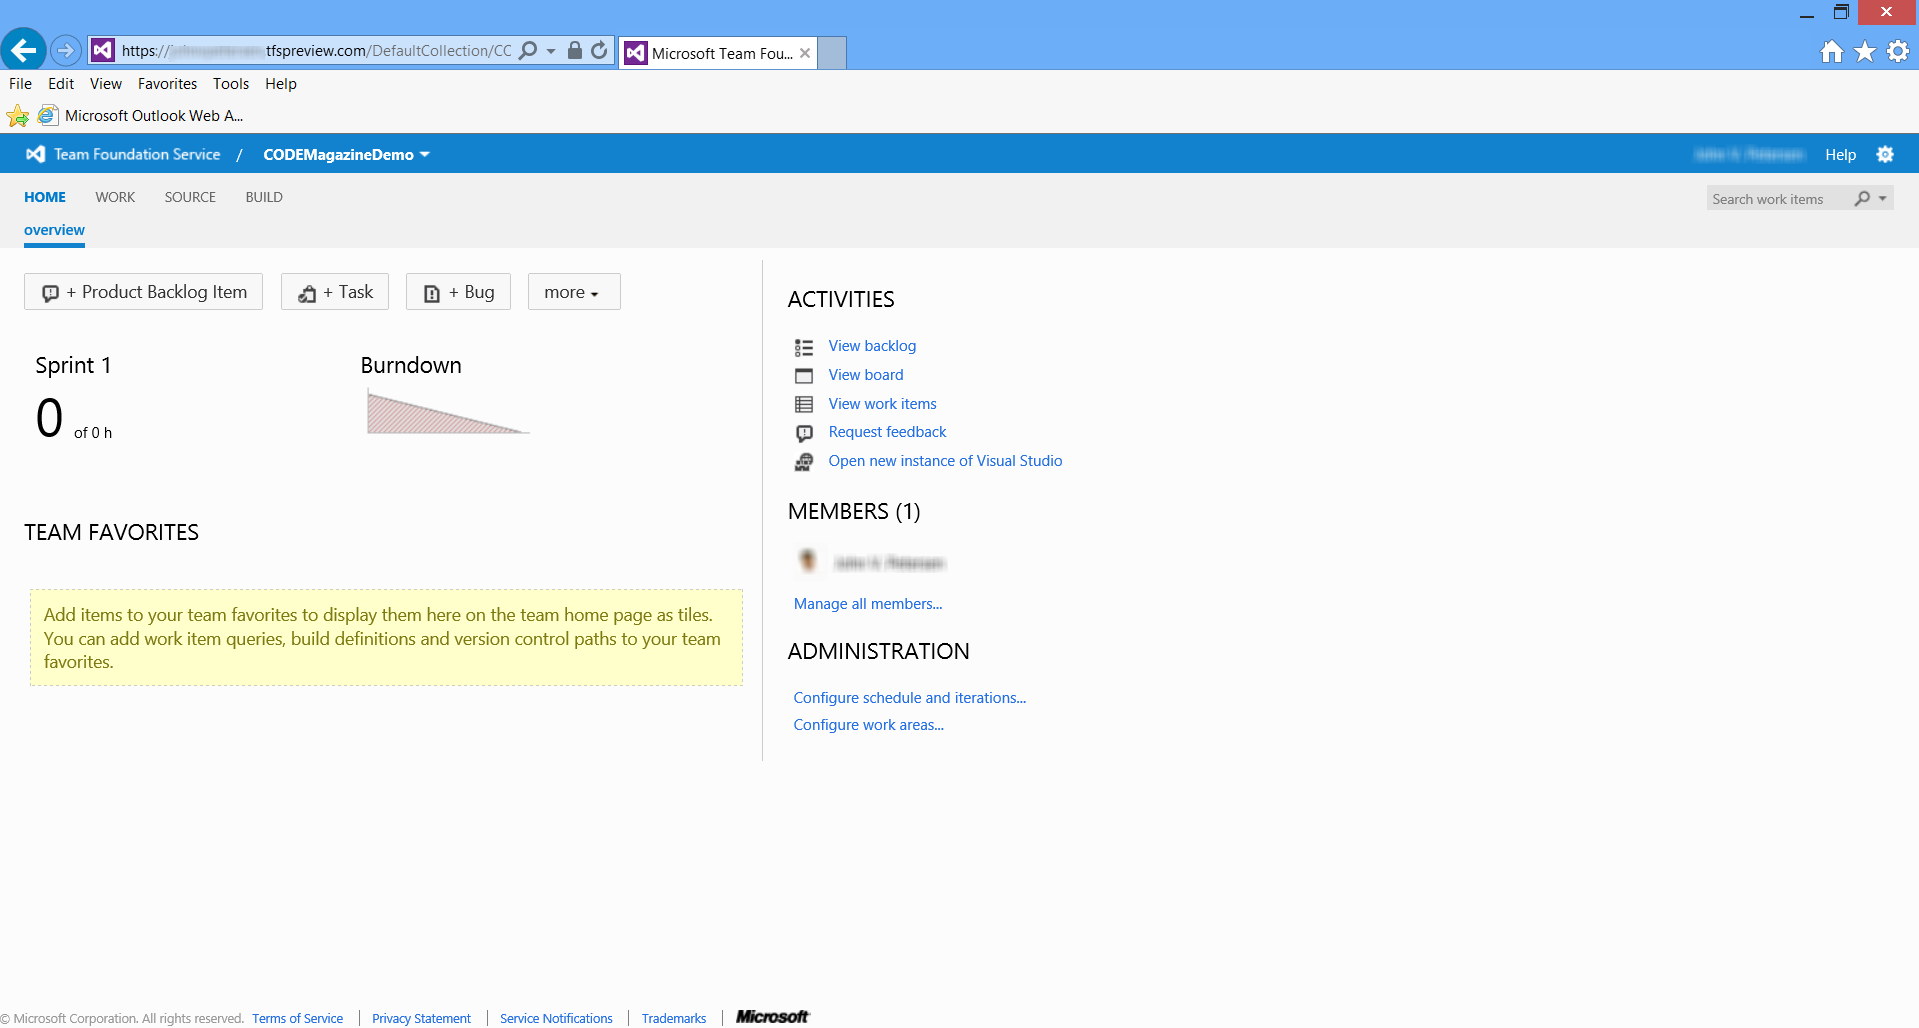
Figure 3 illustrates the Team Project Dashboard. You can now use the TFS Team Project.
Step 3 - Create Your Azure Web Site
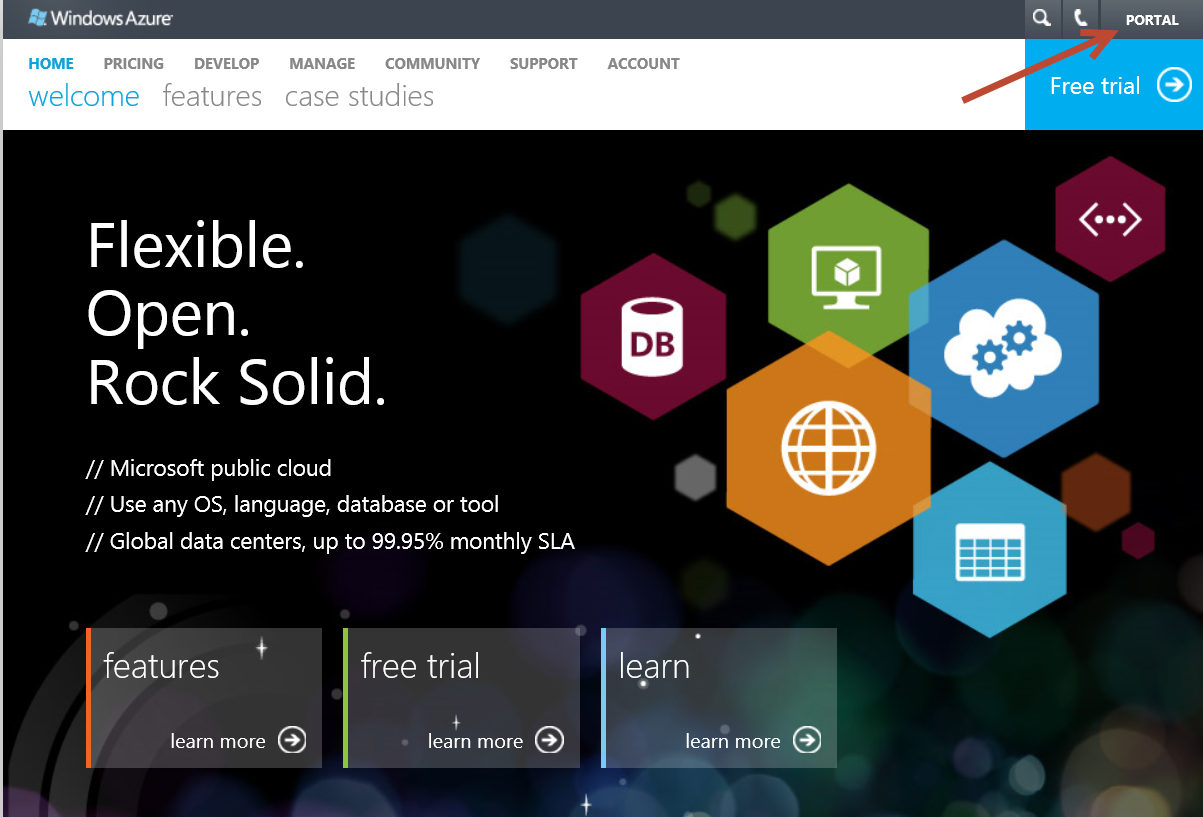
In order to create the Azure web site, you will need to navigate to windowsazure.com and log into your account. Figure 4 illustrates where to find the portal link after you have logged in.
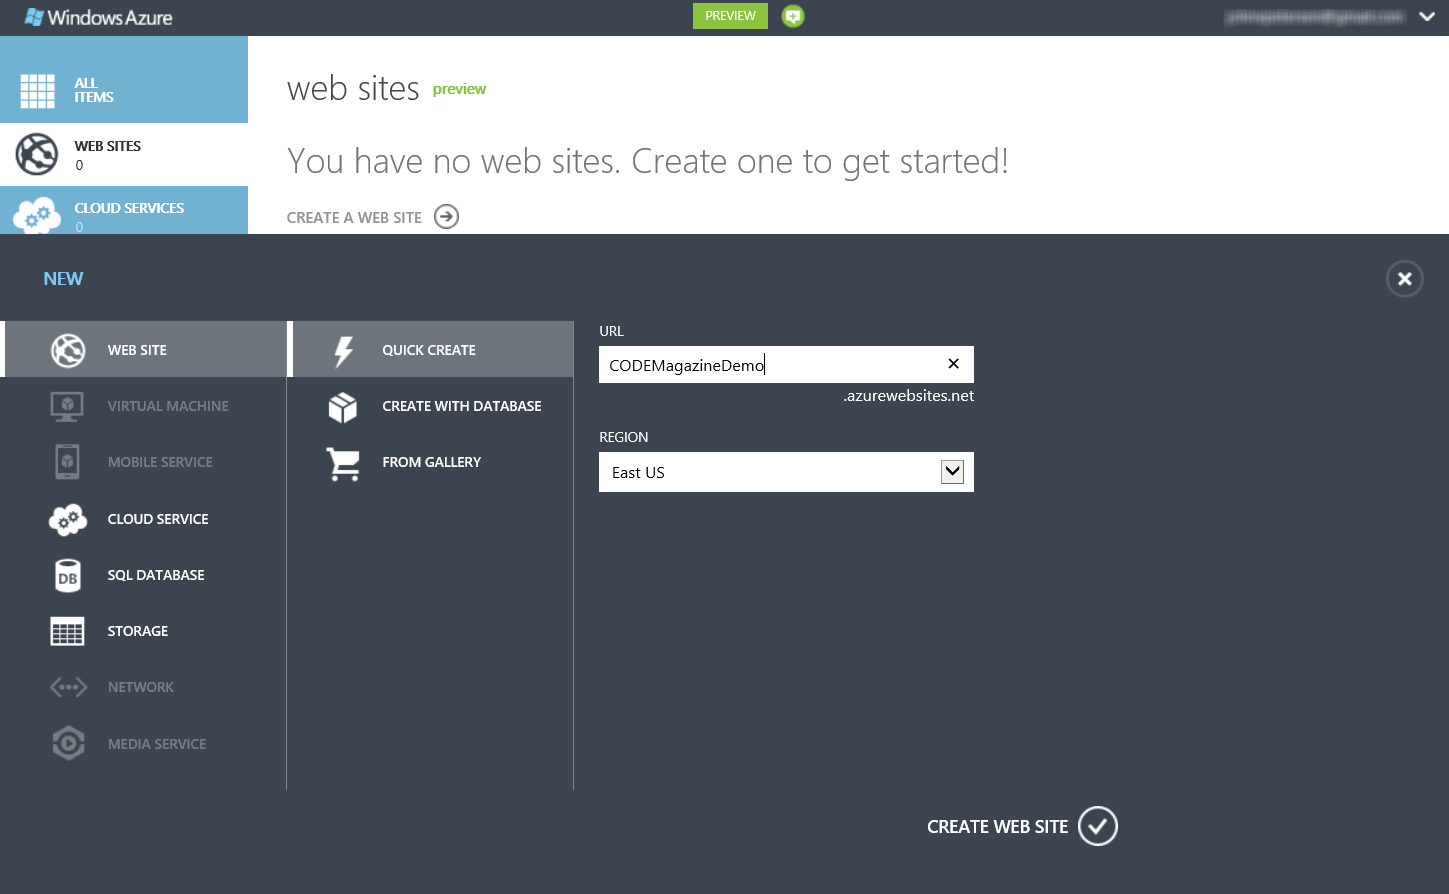
Once you navigate to the Portal, click Web Sites in the menu on the left. From there, click Create Web Site. Figure 5 illustrates the resulting page to complete the web site creation process.
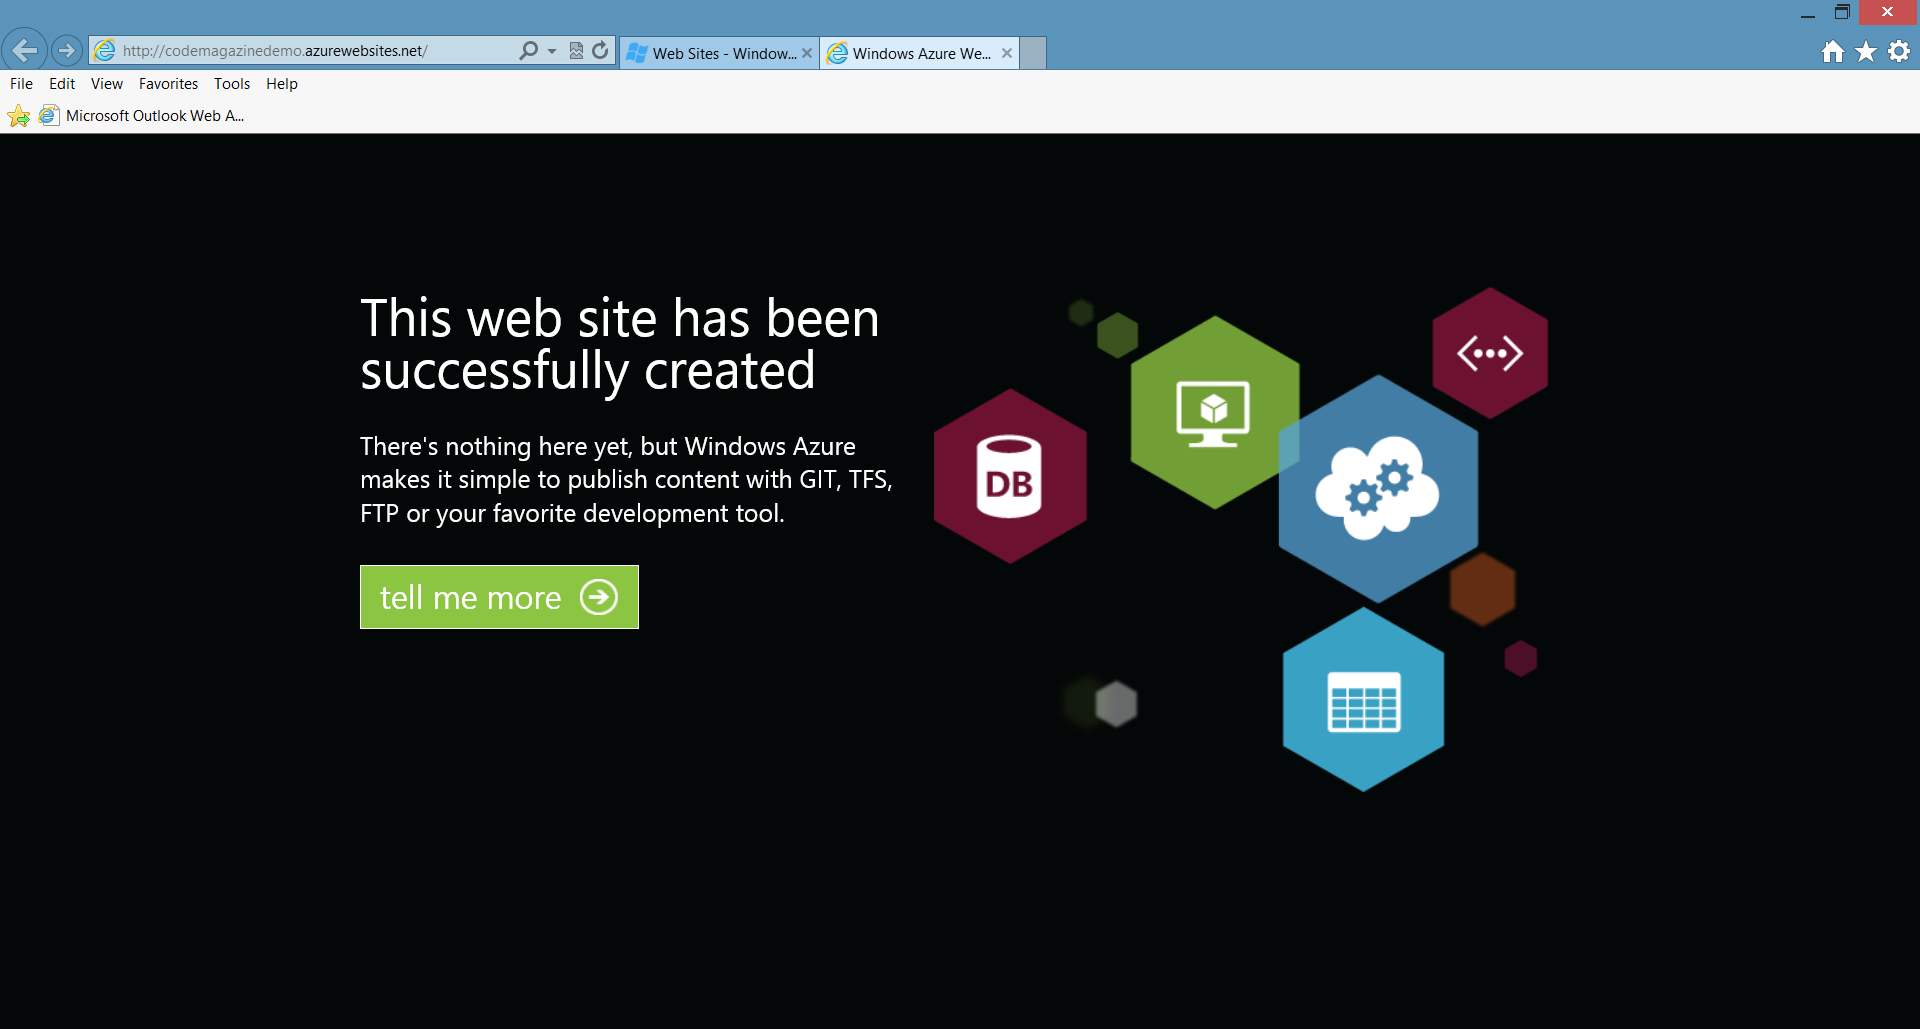
After a few moments, the web site will be created. It doesn’t do anything other than to display a default page. The new codemagazinedemo.azurewebsites.net site is displayed in Figure 6.
Step 4 - Link your Azure Web Site to Your TFS Team Project
With the web site created, the next step is to setup the site for TFS Publishing. From the web site listing illustrated in Figure 7, double-click the web site name to display the web site dashboard which is illustrated in Figure 8.

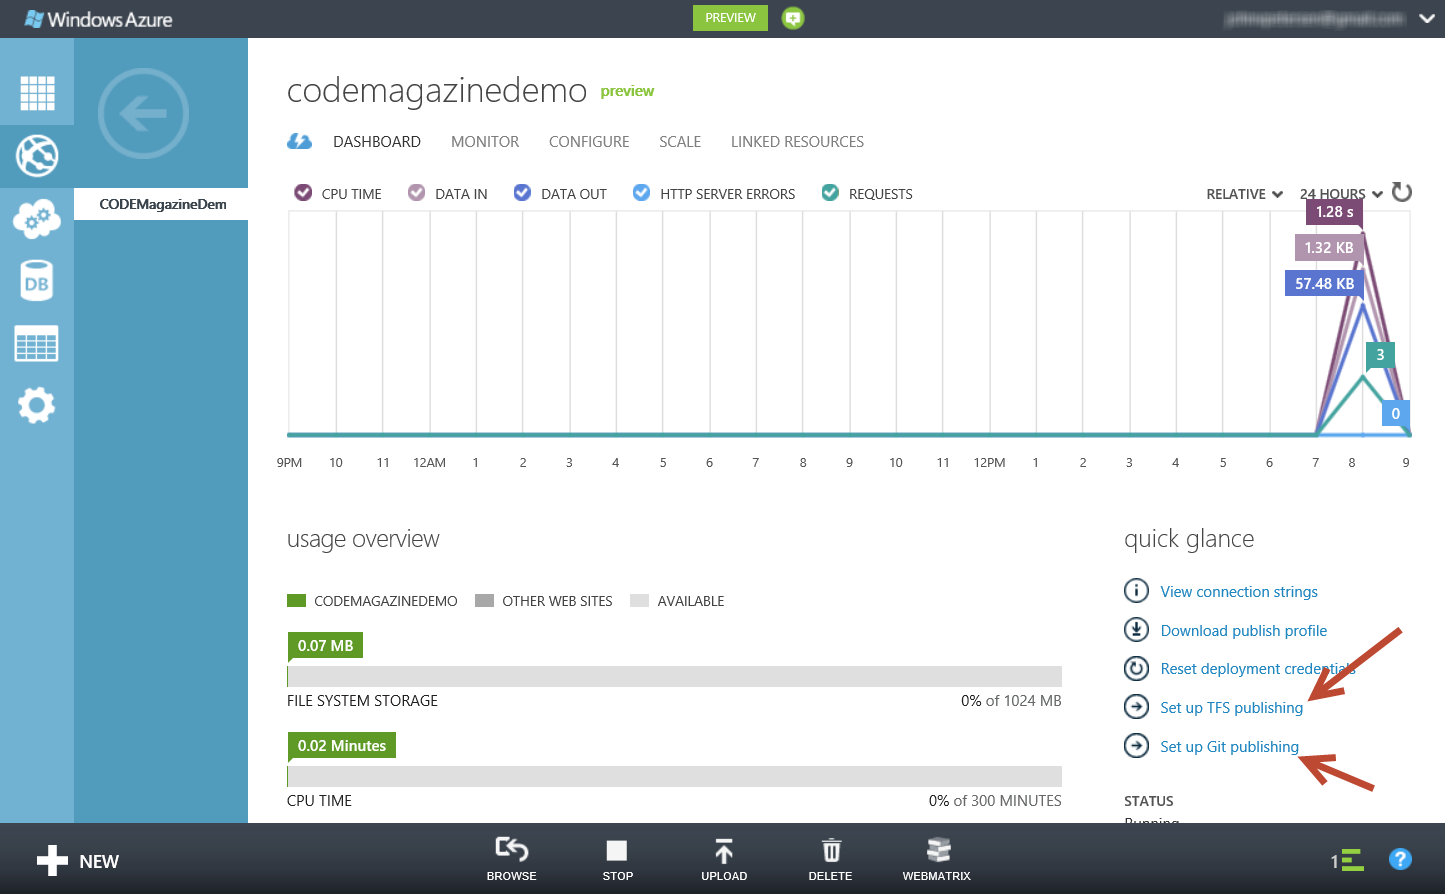
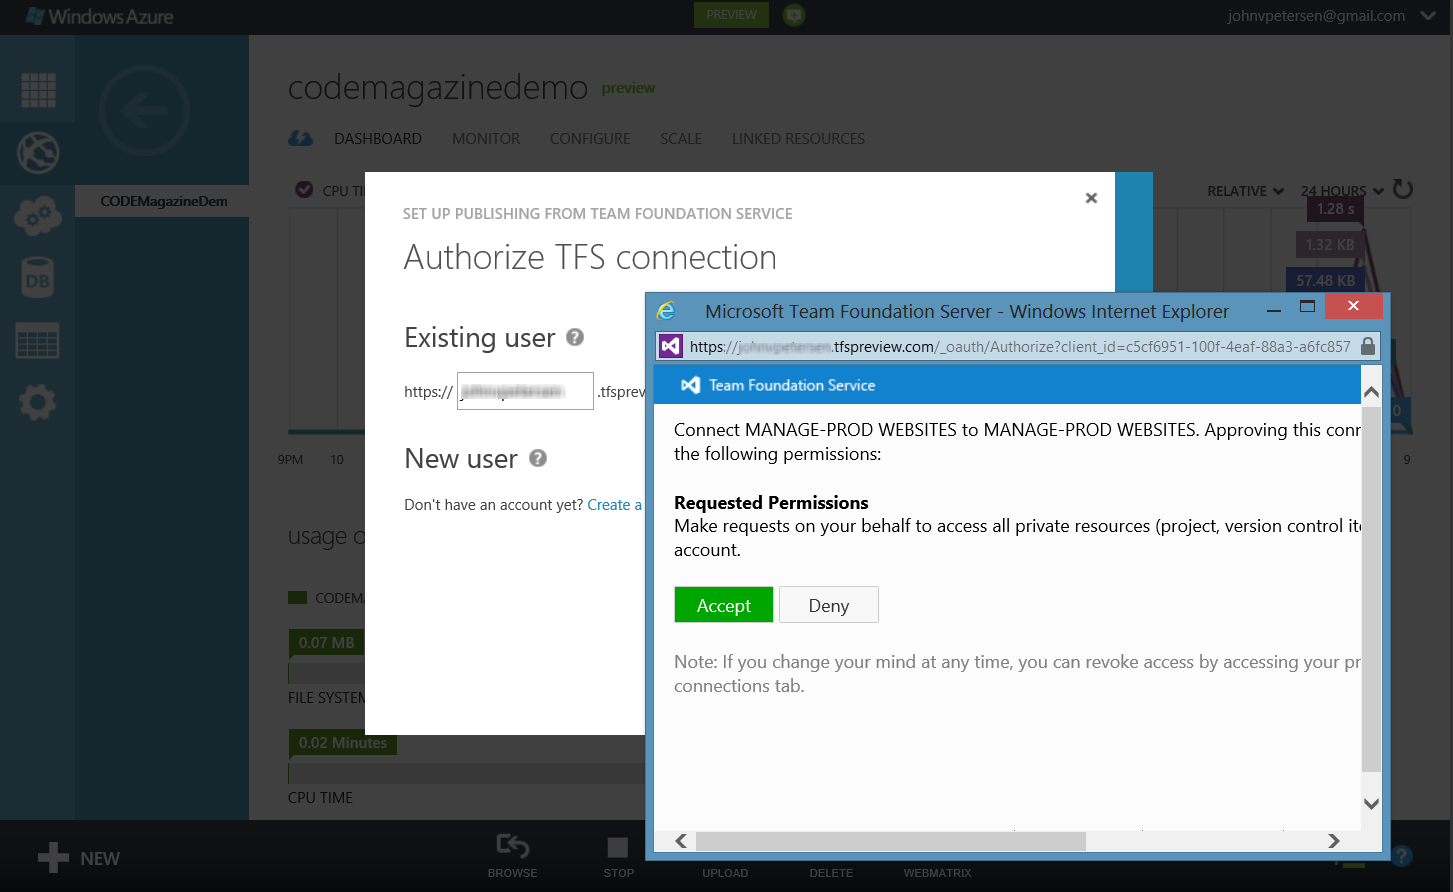
. When you click the Set up TFS publishing link, an oAuth dialog appears (Figure 9) which asks for authorization for the Azure web site to access your TFS account. Once you authorize access, the last step (Figure 10) involves selecting the specific team project.
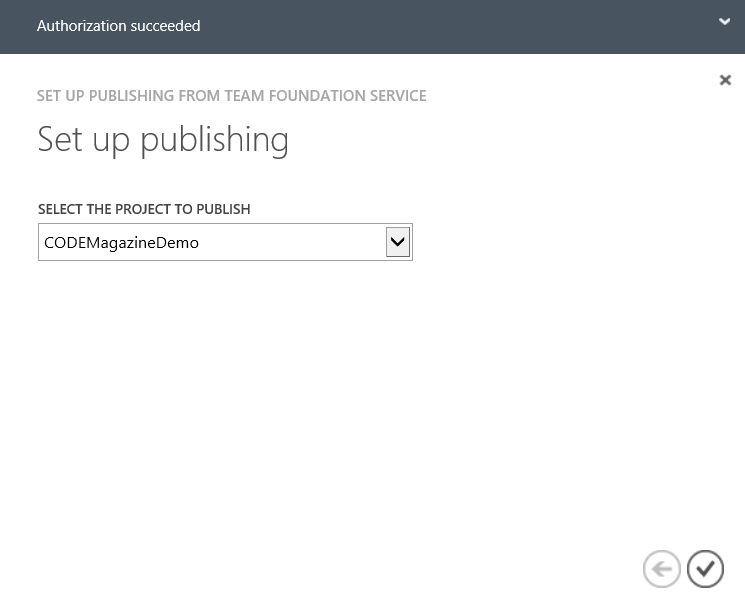
At this point, the Azure web site is linked to the TFS Team Project.
Step 5 - Connect to Your TFS Team Project in Visual Studio and Check in Your Changes
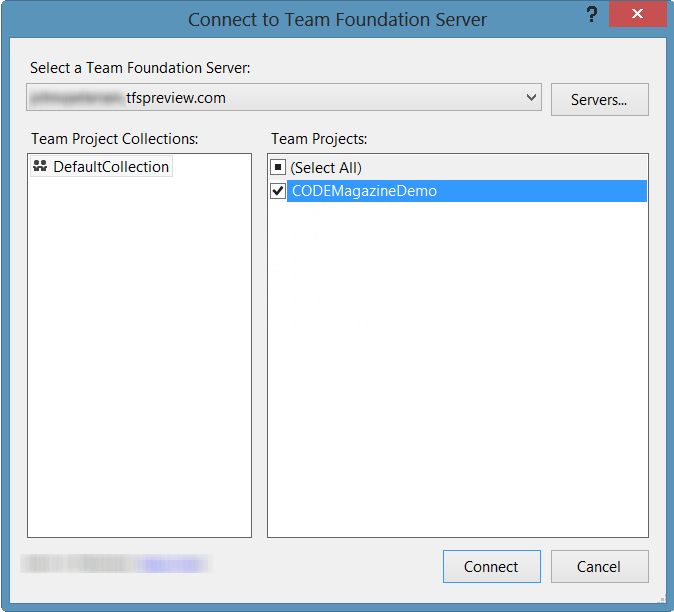
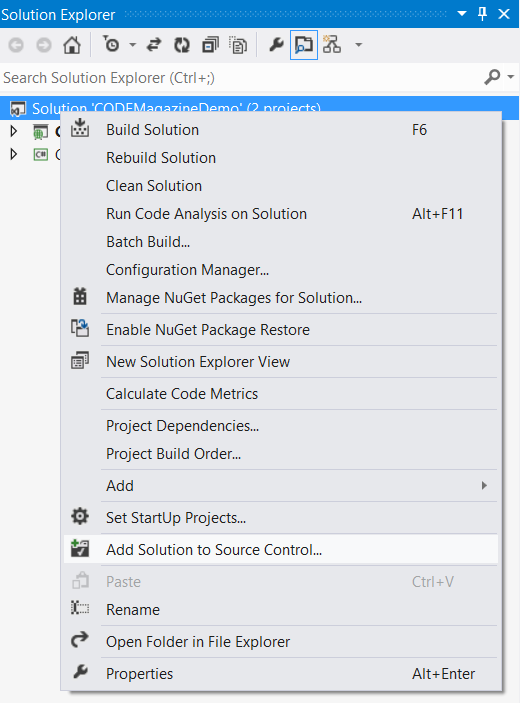
The next step is to get the ASP.NET Project under source code control. First, within Visual Studio, you need to connect to your Team Project. You do this by selecting the Connect to Team Foundation Server option under the Team Menu. Figure 11 illustrates the resulting dialog. Once you are connected to your Team Project, you can then join your solution to source control. Simply right-click the Solution Node under the Solution Explorer and select the option to Add Solution to Source Control. You can see this process in Figure 12.
Once the project has been added to Source Control, Team Explorer will prompt you to check in pending changes (Figure 13).
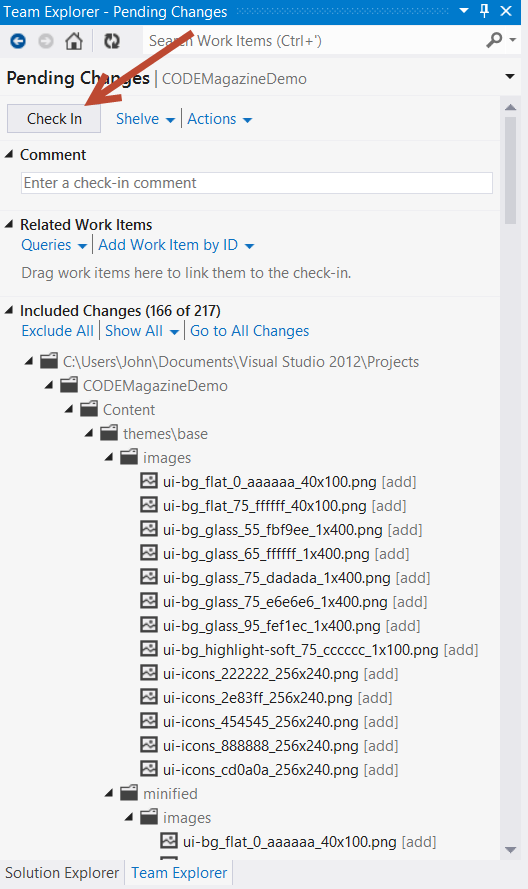
Step 6 - Let the Magic Begin!
With the source code checked in, TFS is already at work building the solution and deploying to the web site. When the Azure web site was linked to the TFS Team Project, a build definition was created. You can see this build definition in the Team Explorer in Figure 14.
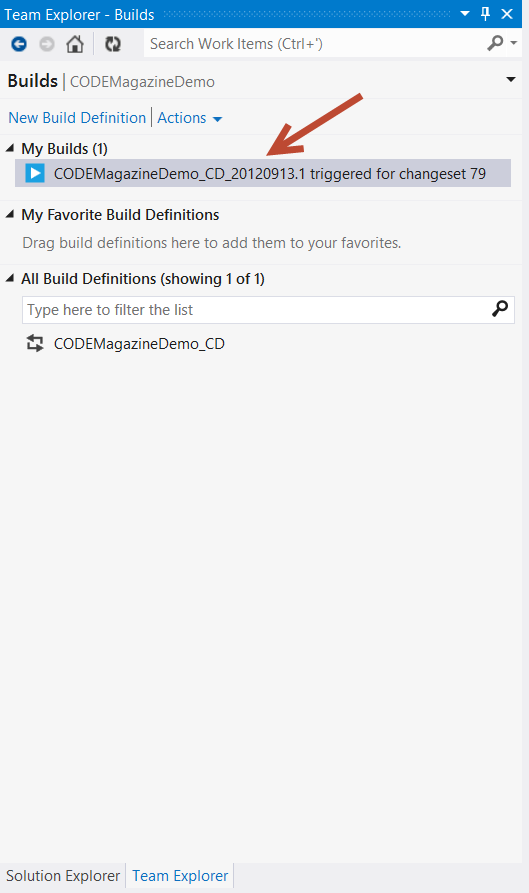
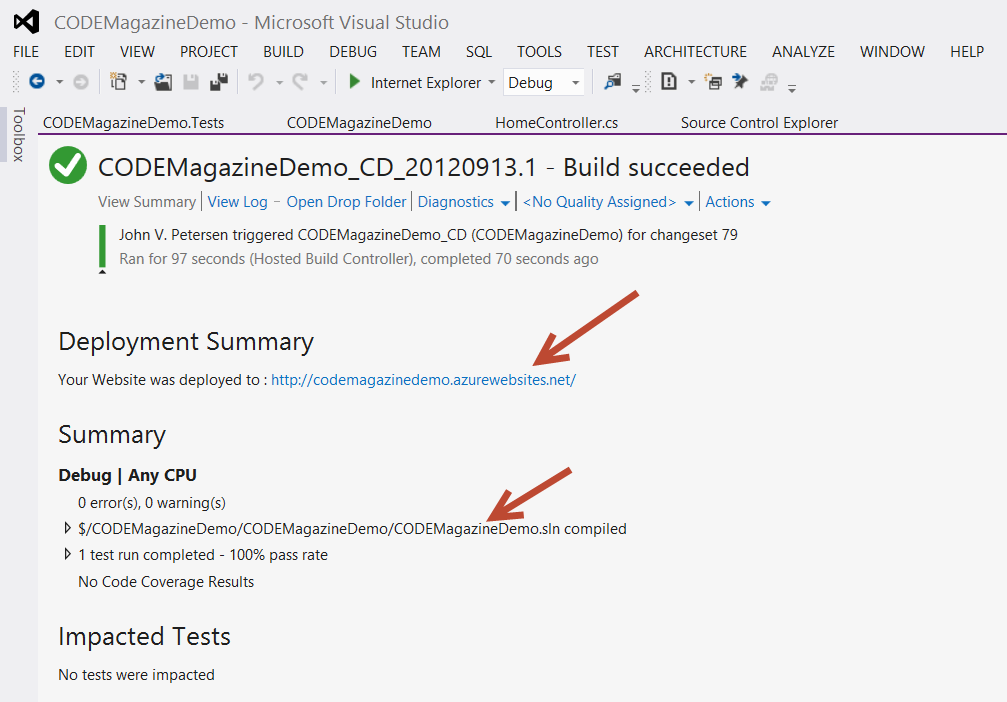
Figure 15 illustrates the output from the build log. As you can see, the site was deployed to our Azure web site and the tests were run.
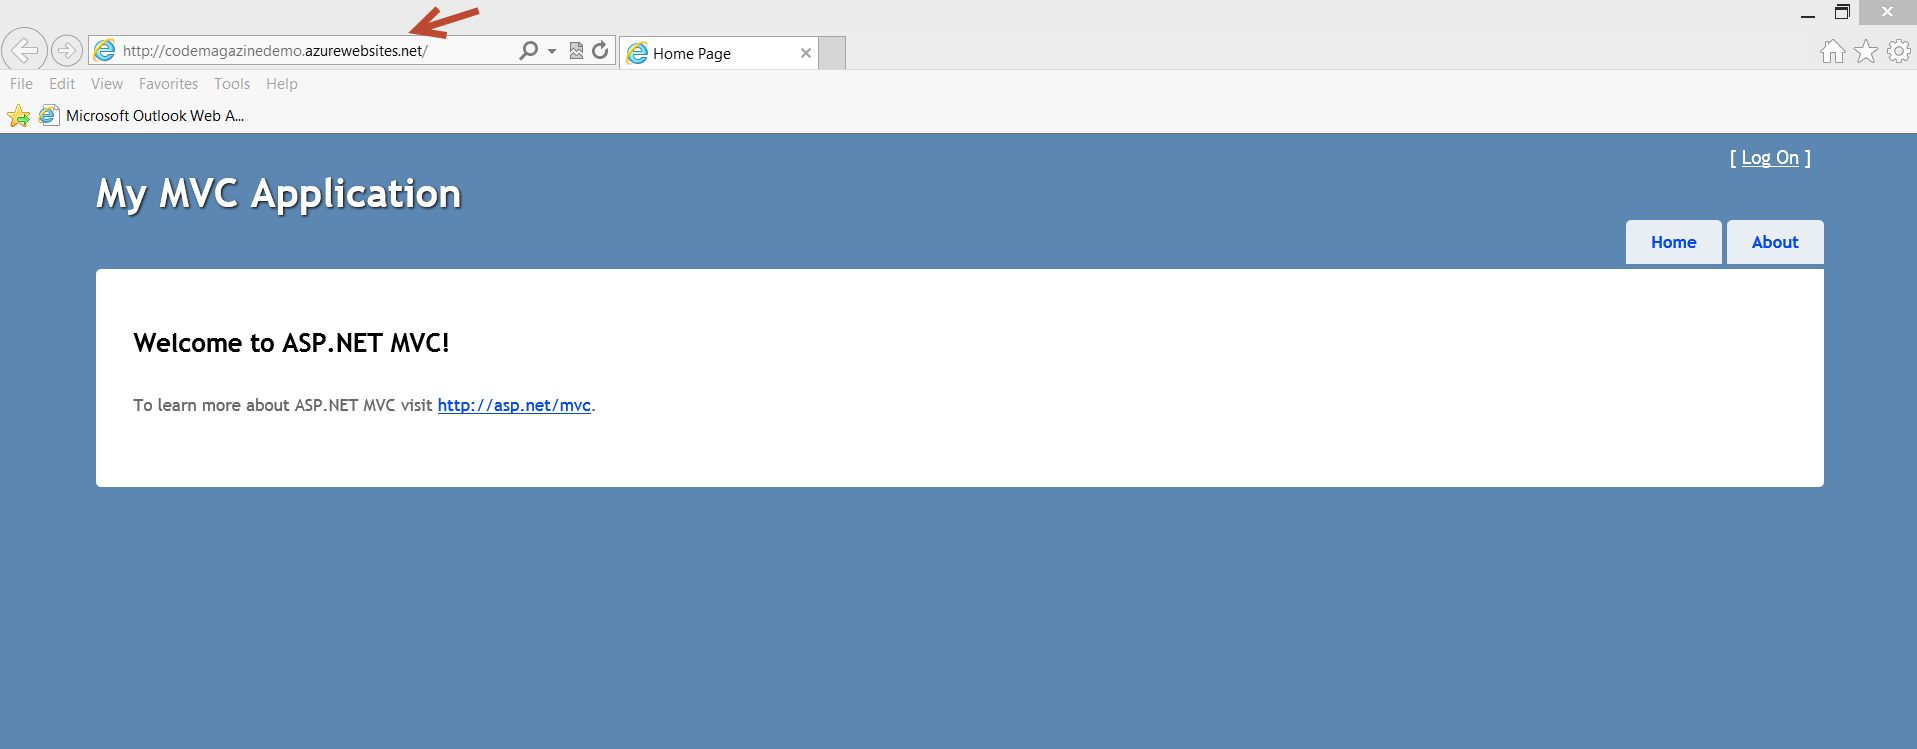
Finally, Figure 16 illustrates the deployed site.
Conclusion
Obviously, there is a lot more ground to cover. For example, you need to connect to a database and interact with data. I’ll tackle that in the next article. As you will see, deploying SQL databases on Azure is very simple. That’s the way these tools should be - simple. They should just work. As developers, we don’t want to get wrapped around the axle with the tooling. With not too much effort, with Azure and TFS 2012, you can easily setup your own development environment with full automated build and deployment services! Here, we don’t need to worry about infrastructure. If you want to use Git as your source code repository, simply setup that publishing choice. As a developer, this is where you will want to start. In the beginning, you just need to get some simple tasks done. In the case of Azure, it’s a matter of understanding how the different tools work together to support the platform. Once you get comfortable with these tools and technologies, the next step is to deliver solutions to your clients. Enjoy!


