


Periodically, I return to some aspect of how to easily test JavaScript. It seems every six months or so, new tools are available and new techniques are developed. The goal is always the same, reduce development friction. We all seek greater productivity by making things easier, not more complicated. In this article, I focus on how to easily test JavaScript in the Visual Studio Code editor using Node.js as a JavaScript execution environment. In the spirit of simplicity, this article is intentionally very brief.
In order to work through the examples in this article, you'll need to have Visual Studio Code and Node.js installed on your computer. If you aren't familiar with Visual Studio Code, you can learn about it here: https://code.visualstudio.com/. From there, you can download and install it, and you can use their learning resources to get you up and running. For Node, you can download and install from here: http://nodejs.org.
Step 1: Install the Node Modules Node-Fetch and Make-Runnable
Just as you use NuGet to extend .NET-based applications, you use the Node Package Manager (NPM) to extend node-based applications. The NPM packages employed in this article are node-fetch and make-runnable:
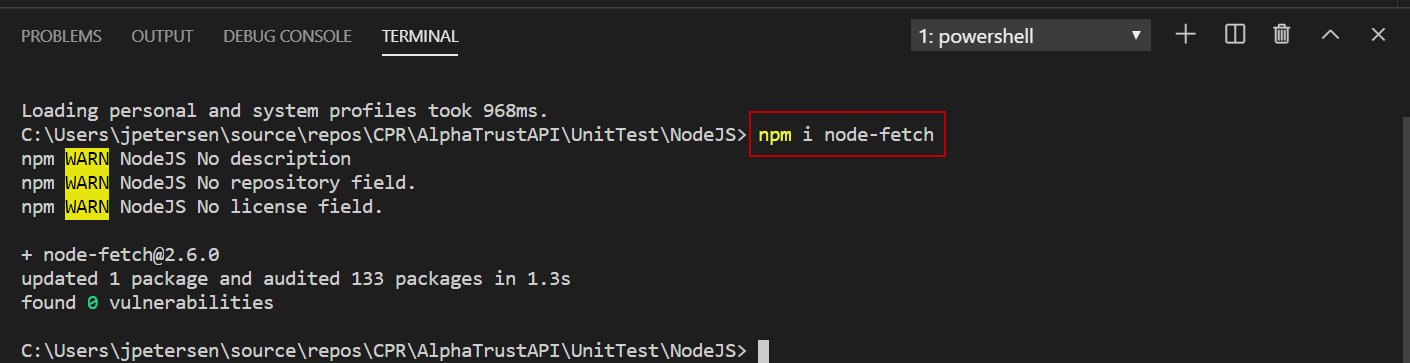
- node-fetch: https://www.npmjs.com/package/node-fetch implements the fetch API, which is an alternative to the old XMLHttpRequest (XHR) object. For details on fetch: https://developer.mozilla.org/en-US/docs/Web/API/Fetch_API/Using_Fetch. The fetch API, unlike XHR, is a compact way of making asynchronous calls and interacting with promises. For more information on JavaScript promises, consult: https://developer.mozilla.org/en-US/docs/Web/JavaScript/Reference/Global_Objects/Promise. Figure 1 illustrates the node-fetch installation.
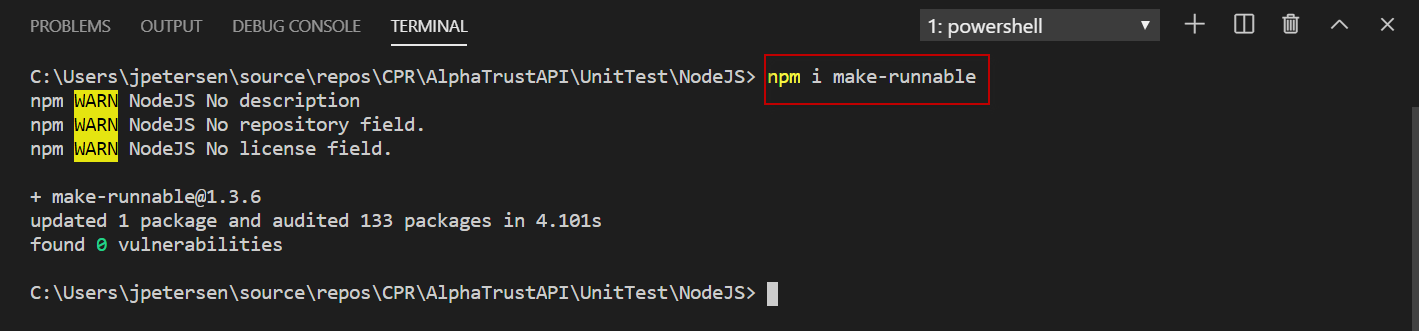
- make-runnable: https://www.npmjs.com/package/make-runnable makes it easy to run exported module functions from the command line. The idea behind this module is to reduce the friction with testing JavaScript modules. With reduced friction comes increased productivity. Figure 2 illustrates the make-runnable installation.
Step 2: Let's Write Some JavaScript Code!
Listing 1 illustrates a simple JavaScript module. Line 1 loads the node-fetch module and line 14 loads the make-runnable module. Lines 3-12 represent the exported JavaScript module. For more information on the module, consult this resource: https://developer.mozilla.org/en-US/docs/Web/JavaScript/Guide/Modules. If you've worked with JavaScript promises in the past, you'll appreciate the code efficiencies with the fetch API.
Listing 1: JavaScript Module
const fetch = require('node-fetch');

module.exports = {

    API: function() {

        const url = '<a href="https://jsonplaceholder.typicode.com/todos/1'";>https://jsonplaceholder.typicode.com/todos/1'<;/a>;
        const json =  fetch(url).then(response => response.json());
        return json;
    }
}

require('make-runnable');
Step 3: Testing the Code from the Command Line in VS Code
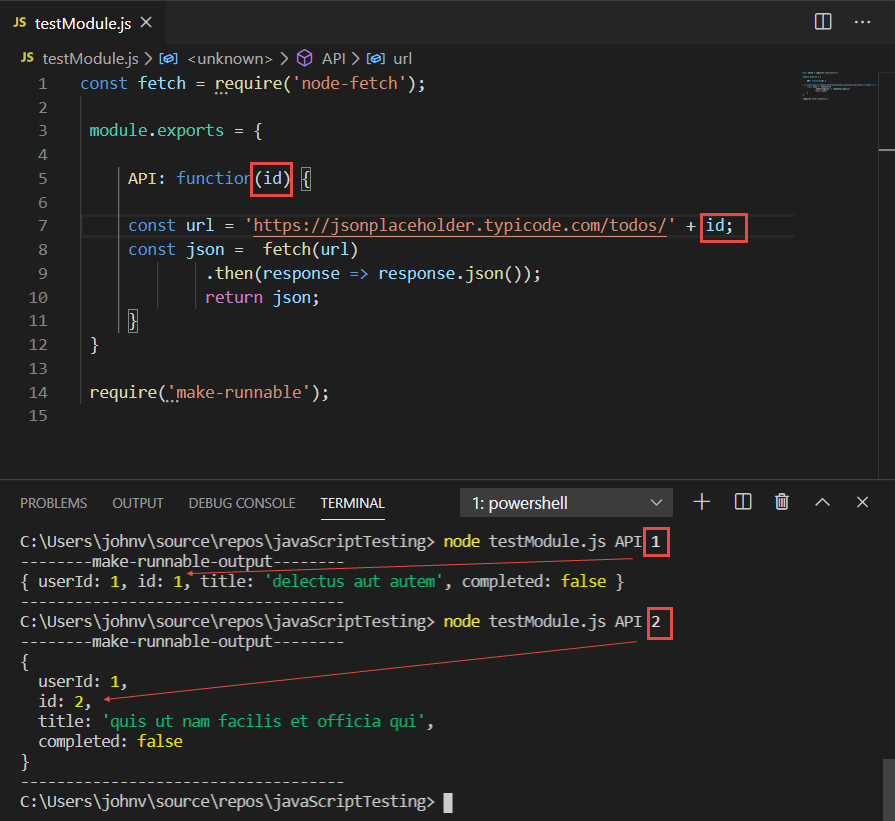
Figure 3 illustrates how to run the code from within VS Code. You can run the code from any command prompt. The nice thing about Visual Studio Code is that it provides quick access to a PowerShell terminal. The function's return value is echoed to the terminal.

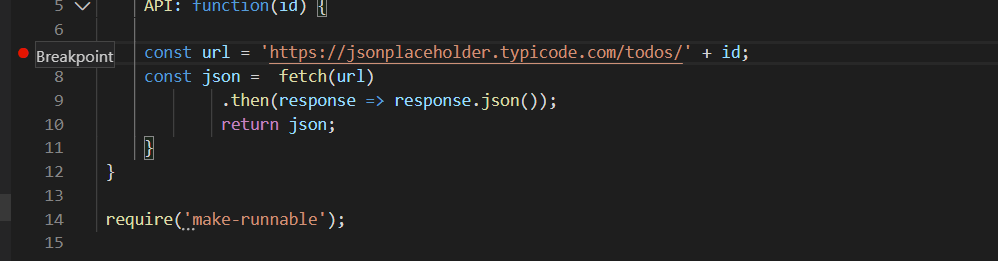
In the real world, our JavaScript functions typically require at least one parameter. Figure 4 illustrates the modified code and how to pass a parameter in the function call.
What About Break Points?
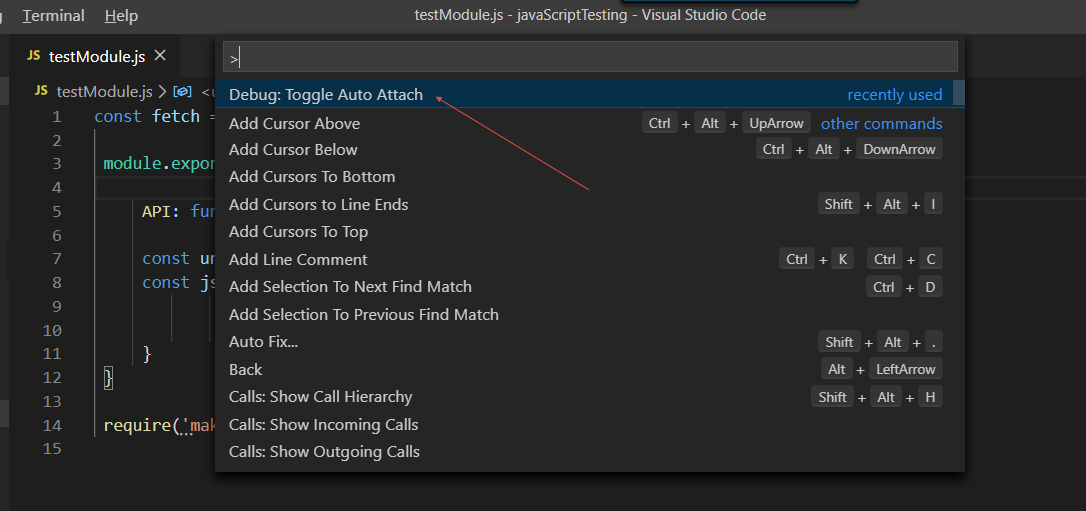
No testing or debugging article in the context of a full-featured editor, such as Visual Studio Code, would be complete without the ability to add break points and step through code. The first step to getting break points to trigger is to toggle the auto-attach feature in Visual Studio Code. Figure 5 illustrates how to toggle the setting in the command palette through the Ctrl+Shift+P shortcut.
Once you've toggled the auto-attached feature, set a break point. Setting breakpoints in Visual Studio Code is done in the same way as it's done in Visual Studio. Figure 6 illustrates setting a breakpoint.
Finally, let's run the code and trigger the break point. For the break point to be hit, you must add the ?inspect-brk switch to the node call. The modified call is illustrated in Figure 7.
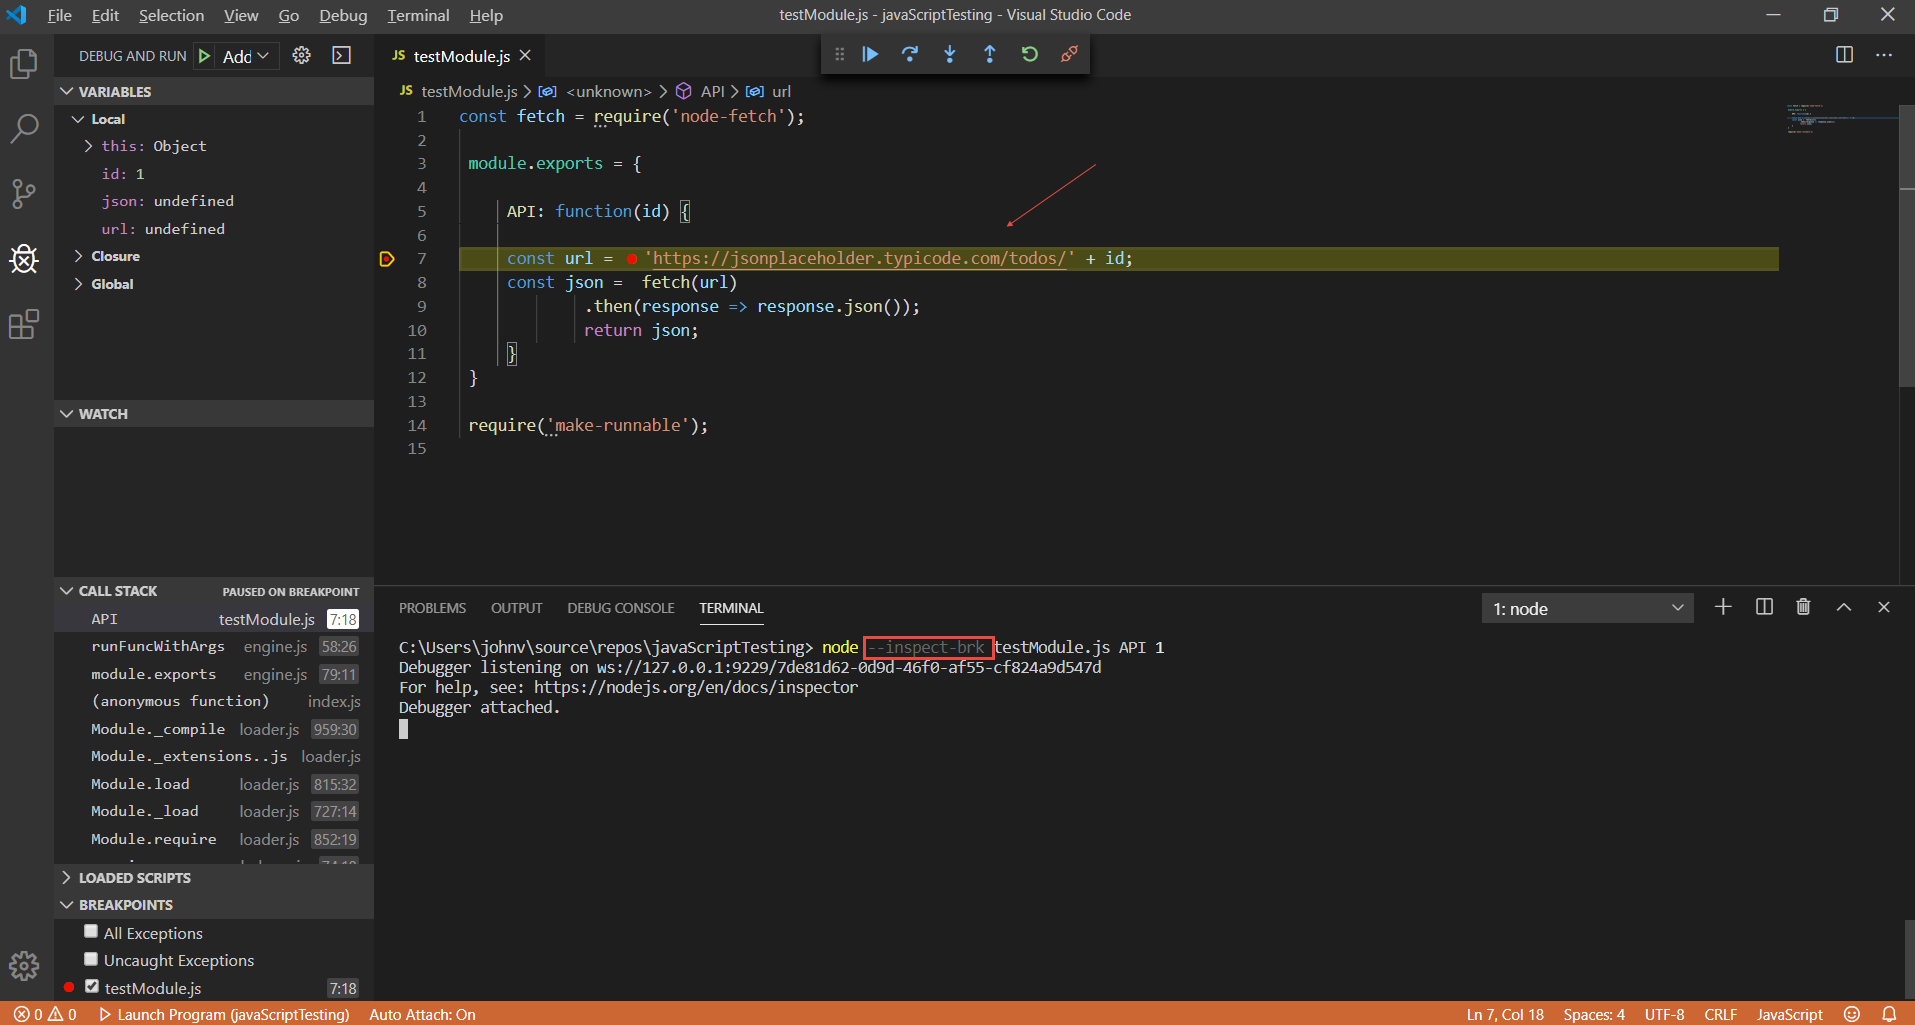
With break points, you can now inspect variables and call stacks to diagnose and fix problems with the code.
Conclusion
That's really is all there is to easily test your JavaScript code in the Visual Studio Code editor. As you can see, if you also need the ability to set break points and step through code, that's a very simple process as well.
